Alright! So the idea struck out of blue one day when I was shocked to see someone sitting outside my office enjoying reading a newspaper!
I had no idea who this person was, when did he come and since how long was he enjoying his unsolicited stay just outside my cabin? You must be thinking what a fool I am but you gotta trust me on this, my office is one of the creepiest that one can get anywhere. Seriously!
I had an Arduino UNO clone ready at my disposal. So, all that I needed was an ultrasound sensor, and a Buzzer. Rest of the steps, circuit assemblies, software code are ensued in this tutorial. I hope this would excite few electronics newbies out there.
This is a nice project that you can continue to work on and modify as you learn more Arduino projects. This tutorial goes through the complete build for the bluetooth enabled robot in the first half of the video. It takes in total about 35 hours to 3D print, but can be assembled and programmed in around 30 minutes. Requires only 2 screwdrivers to build and does not require any soldering.
I wanted to design this thing to be inexpensive and use common parts, so this robot uses 9V batteries currently. They run out pretty quickly with a lot of use, so I will probably end up designing a new piece that allows for the use of rechargeable lithium ion batteries and Adafruit power booster.
Step 3: Lightly Sand Wheels and Put Together Legs.
The wheels print in two pieces so use super glue and put them together. Lightly sand out the imperfections. Put the 4 balls inside the castors and push them all the way until they snap into place. Attach the 4 castors to the legs like in the below picture.
Step 4: Get the legs ready and add the geared DC motors.
Get the two posts in the first picture and connect each one to each leg. Get the piece that will hold the battery in the second picture and screw that into one leg.
Find the small L shaped piece and attach it to a motor exactly like the 4th picture shown above. Do the same thing with the other motor, and attach both to the legs. Meet the two legs together, being sure the motors are facing the same direction and you should have something exactly like the picture below.
Step 5: Add battery with box and complete base.
Find the two curved side pieces in the first picture and connect them to the base according to the second picture. Place the battery box with battery onto the base according to the third picture and find the battery back piece and use it to enclose the battery like the last picture. The base is not complete.
Step 6: Add the middle pieces to the base and add the range sensor and motor driver.
- First use a skinny screwdriver and start the screw in the (robot's) left side middle piece according to the first picture. Its a tight fit and the screw will barely fit under that tab, I have broken the tab off many times, but luckily you have super glue and its an easy fix.
-Pull both battery wires and left side motor wires through the hole and tighten the screw you started. Tighten the second screw and secure the left side piece. Add the faux servo piece to this side and tighten both screws that hold it in, as in the third picture.
-Attach all 4 male to female wires to the HC-SR04 range sensor, it doesn't really matter what colors you use as long as they are different colors and you write down what color goes to what pin on the sensor.
-Put the range sensor into the whole on the side piece like in the 5th picture and put the L298N motor driver on top. You must remove the two jumpers on the motor driver shown in the 6th picture.
-Attach the wires from the battery and the left side motor to the L298N motor driver according to the diagram. Add some male to female (or male to male) wires coming from the positive and negative terminals of the motor driver.
-You will have now two connections in the negative terminal, one going in and one coming out. Just to be clear it will look like the 7th picture (above).
-Grab the right side middle piece and add the other faux servo piece to that side with two screws.
-Now pull the right side motor wires through the right side piece and attach those wires to the motor driver. Try to attach them in order, i.e. left side wire to left most hookup on the driver (same thing on the other side), that way you don't have to change anything in the code later.
-Use two screws to secure the right side piece, and use two screws to secure the motor driver, one per side piece is fine but there are holes to add all 4 if you want.
-Finally, add 6 different color male to female jumper wires to the 6 pins on the motor driver.
Step 7: Almost there.
-Use a screwdriver and add slack to the positive and negative battery wires as shown in the first picture (makes it easier for the battery to slide out the side when you need to change it).
- Attach the claws to the arms and attach those to the shoulder pieces as shown in the first picture. Attach the arms to the faux servo pieces, as in the second picture.
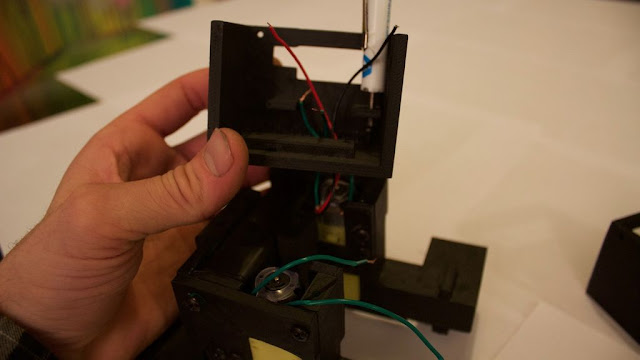
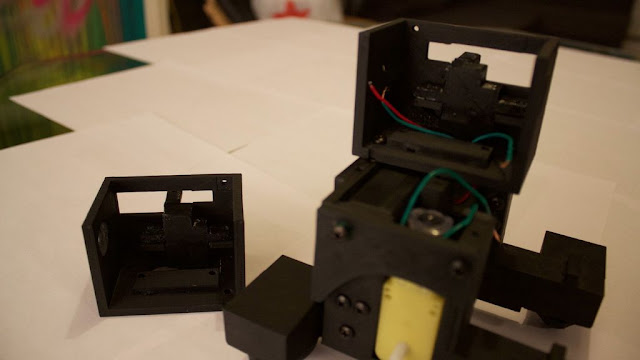
-Find the neck piece in the third picture and attach the C shaped piece (file name neckNoServo.stl) with two screws from the bottom. Pull all the wires through that assembly. Attach the neck assembly with 4 screws to the base that you have so far.
-Add the head bottom piece and pull the wires through that try to use the orientation of the wires in the 4th and 5th picture. Range sensor wires through the left most hole (robot's right), motor driver wires through the center, and power and ground through the right most hole. Attach 4 male to female connectors to you bluetooth module and tape them together if possible. It is going to go underneath your Arduino board like in the last picture. This is down so it can be unplugged easily when uploading new sketches.
-Wire everything according to the diagram.
Step 8: Done.
Attach the two halves of the face with 4 screws. Find the ears/antennae and attach them to filename earsNoServo.stl. They should now look like the T shaped pieces in the first picture. Attach them to the head top piece. Each one has two screws. Put the face piece on and pop the LEDs into the eyes, bending the pins at a 90 degree angle so they can't fall off like in the second picture.
Step 9: Upload the code and Download app.
Download the Android apps in the two pictures below.
Pair your bluetooth module to your computer or phone with the password "1234" it will be called HC-06.Everything else is pretty straight forward to use, if you watched the video, the apps are pretty intuitive to use.
To control the robot via bluetooth from you computer connect the serial monitor to bluetooth port HC-06 and use these commands with CAPITAL LETTERS (put caps lock on) and hit enter after each command:
S = stop, F = forward, B = backward, L = left, and R = right.
IMPORTANT*** anytime you need to upload a new sketch the bluetooth module must be unplugged or else the code will not upload.
The automatic watering system simple just read the water level in the water bowl with a HC-SR04 Ultrasonic Sound Sensor. It measure the distance to the surface of the water. If the level is less then 3cm for more than 30sec it triggers a 5V relay whit a NO-contact . The relay are controlling a 12V DC supply to a mini watering pump in the water tank.
This project was made for fun. I came across an idea for just a 2D radar. I wanted to expand upon this. So I created a program that enables you to scan an entire room without needing to use a laser. It works by scanning 100 degrees along the x plane, then going up by 1 degree at a time along the y plane. It then send data via serial to a processing computer. With only an Arduino board, two servos, and an HC-SR04, you can create a room scanner that is capable of showing depth!
If the robot detects an object in front of it, with the help of a small servo motor, it scans the area left and right in order to find the best way to turn. It has a notification LED, an buzzer to play a tone when an object is detected and an button for changing the function of the robot (stopped / moving forward).
Use super glue to attach the servo motor in the front side of your robot. Watch the first image to understand how to put the ultrasonic sensor in the servo motor by using a small gear piece. The second image shows the completed part that will be the 'eyes' of your robot.
Step 4: Connect The Circuit
The connections are pretty easy, watch the image above with the breadboard circuit schematic.
(Tips: Use the breadboard only for the LED, buttonand buzzer, this will keep it simple and you can use the remain area to add more stuff on the future.)
Step 6: Upload Code To Robot
Plug an battery on it and press the function button once, your robot will start moving forward after upload the code to robot. To stop it, just press the button for one more time.
You can press the 'Edit' button and start making your modification in the sketch. For example, try to change the '10'cm value that is the distance that will make the robot to stop and 'look' for a clear path. [Note: If your robot doesn't move forward, try to change the pins of the motors (motorA1 and motorA2 or motorB1 and motorB2)].
This is tutorial to help you understand ultrasonic and buzzer and go deeper into learning Arduino, follow these steps and give me feedback please. It is an easy to make fun project that you can build in 30 minutes or so. Lets get started !!
Connect the Buzzer POSITIVE terminal to the Arduino pin 2 and the NEGATIVE terminal to the Gnd. Connect the VCC pin of ultrasonic to +5V pin of Arduino board and the Gnd to the ground. Connect trig pin to pin 10 and echo pin to pin 19. The schematic circuit diagram may help you.