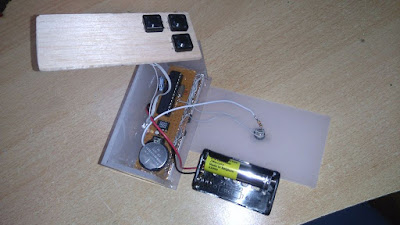
I will show you how to make your own Arduino based 7 segment display (4 digits) clock with sound activation feature!!
The circuit uses the ATmega328p micro controller (the same as the Arduino UNO board) and the DS1302 clock IC. You can easily set/change the time by pressing the setup buttons. The clock can be activated by pressing an button or by making a sound (e.g. clap, blowing, whistle) near the microphone. It can be powered on with two AA batteries (3V) or with an USB cable from your computer (or cellphone's charger, max 5V).
Step 1: What You Need?
1 x Arduino UNO
1 x USB Type-B Cable
4 x 7 Segment LED
1 x 16MHz Crystal Oscillator
2 x 22pF Capacitor
1 x 100nF Capacitor
1 x 10k Ohm Resistor
1 x 120 Ohm Resistor
2 x LEDs (Red)
3 x Pushbuttons
1 x DS1302 Clock Module
1 x Prototyping PCB Circuit Board Stripboard
1 x 16MHz Crystal Oscillator
2 x 22pF Capacitor
1 x 100nF Capacitor
1 x 10k Ohm Resistor
1 x 120 Ohm Resistor
2 x LEDs (Red)
3 x Pushbuttons
1 x DS1302 Clock Module
1 x Prototyping PCB Circuit Board Stripboard
Optional
2 x 1.5V AA Battery & 1 x 4xAA Battery Holder
1 x 9V Battery & 9V Battery Holder
1 x Mini Breadboard or Breadboard
4 Digits Segment LED
Cable Cover
Arduino Compatible UNO Ultimate Starter Kit / Learning Kit
USB To Power Jack Cable
Arduino Compatible UNO Ultimate Starter Kit / Learning Kit
USB To Power Jack Cable
Don't have components? Don't worry. Just click the component's name.
Step 2: Build Your Circuit.
Buttons:
- Select/Set function button to Arduino pin A0
- Change time/min function button to Arduino pin A1
- Show time button to Arduino pin A2
Microphone:
DS1302:
LEDs:
7 segment displays:
Connect the same letters of 7 seg digits pins with others- 1 - "E" - Arduino pin 6
- 2 - "D" - Arduino pin 7
- 4 - "C" - Arduino pin 8
- 6 - "B" - Arduino pin 12
- 7 - "A" - Arduino pin 11
- 9 - "F" - Arduino pin 10
- 10 - "G" - Arduino pin 9
Common cathode pins:
- 1st digit CC pins to Arduino pin 3
- 2st digit CC pins to Arduino pin 4
- 3rd digit CC pins to Arduino pin 5
- 4th digit CC pins to Arduino pin 13
Tip: Make your circuit on breadboard first
Step 3: Upload The Code To Board.
If you have any problems with sound activation feature change the values 660 and 750 (line 127):
if ((digitalRead(showBT) == LOW) || (sound<660 || sound>750))


Want to make this digital clock as hobbyist, please tell me how to get SevenSeg.h"
ReplyDelete<DS1302.h and include in program, in which directory these files to be kept, so that error free compilation can be done and succesfully downloaded. please Guide me
Uttam Dutta,u.dutta@hotmail.com
The BEST! ;-)
ReplyDeleteThankyou for this wondrous post, I am glad I observed this website on yahoo. watches
ReplyDelete