Showing posts with label Keyboard. Show all posts

Tuesday, July 26, 2016

Keyboard Serial

This example listens for a byte coming from the serial port. When received, the board sends a keystroke back to the computer. The sent keystroke is one higher than what is received, so if you send an "a" from the serial monitor, you'll receive a "b" from the board connected to the computer. A "1" will return a "2" and so on.


NB: When you use the Keyboard.print() command, the Leonardo, Micro or Due board takes over your computer's keyboard! To insure you don't lose control of your computer while running a sketch with this function, make sure to set up a reliable control system before you call Keyboard.print(). This sketch is designed to only send a Keyboard command after the board has received a byte over the serial port.


Step 1: What You Need?

1 x Arduino Leonardo, Mirco, or Due Board


Don't have components? Don't worry. Just click the component's name. 


Step 2: Build Your Circuit.

Connect your board to your computer with a micro-USB cable.


Step 3: Upload The Code.

1. Select the Arduino board type: Select Tools >> Board >> Select your correct Arduino board used.
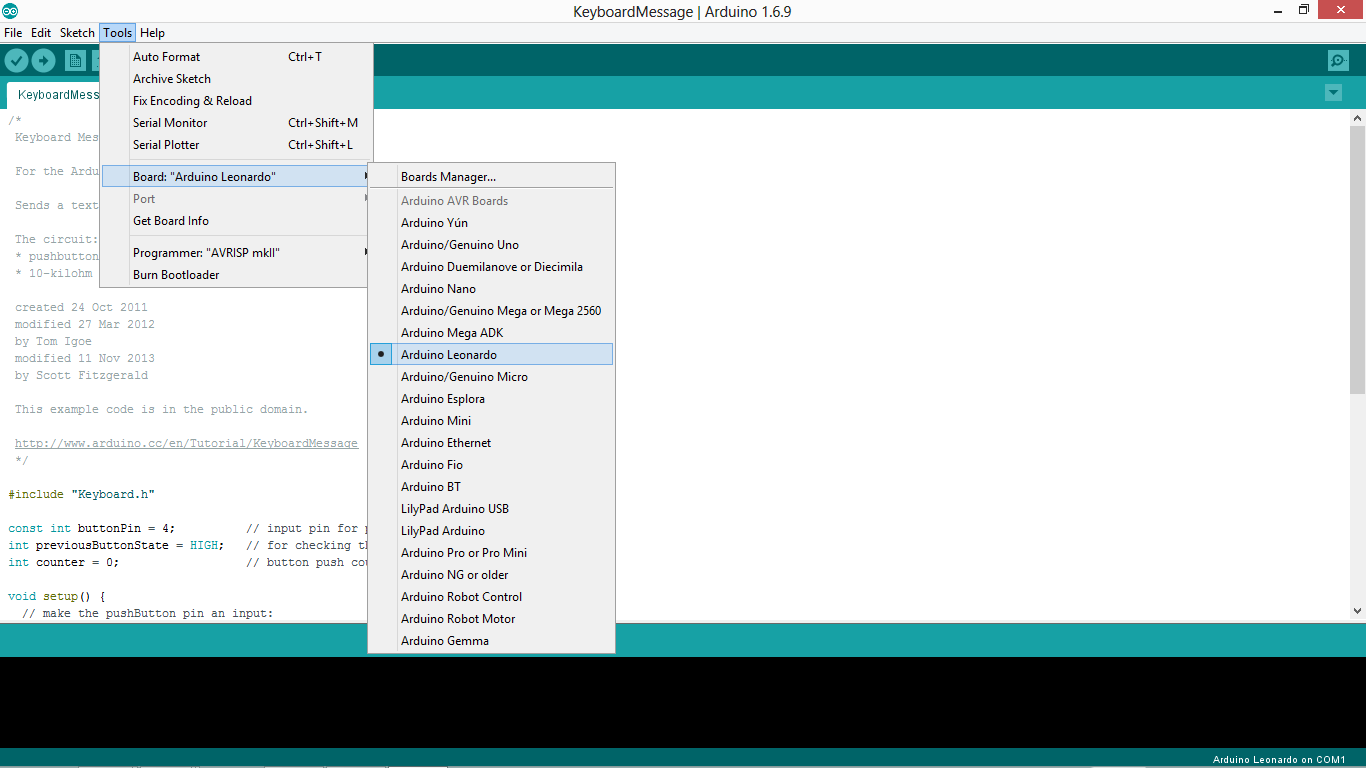

2. Find the port number by accessing device manager on Windows. See the section Port (COM&LPT) and look for an open port named "Arduino Leonardo (COMxx)". If you are using a different board, you will find a name accordingly. What matters is the xx in COMxx part. In my case, it's COM3. So my port number is 3.


Select the right port: Tools >> Port >> Select the port number.


3. You can find this code in the example of Arduino IDE.
Select File >> Examples >> 09.USB >> Keyboard >> KeyboardSerial

Click press the "upload" button (see the button with right arrow mark).

Once programmed, open your serial monitor and send a byte. The board will reply with a keystroke that is one number higher.


09.USB Keyboard Keyboard Serial library

Keyboard Reprogram


This example uses the Keyboard library to open a new Arduino Software (IDE) sketch window, send keyboard commands that type in the Blink example, and reprograms the board. After running this sketch and connecting pin 2 to ground using the pushbutton, the board will have a new program, Blink.


NB: When you use the Keyboard.print() command, the Arduino takes over your computer's keyboard! To insure you don't lose control of your computer while running a sketch with this function, make sure to set up a reliable control system before you call Keyboard.print(). This sketch is designed to only send Keyboard commands after digital pin 2 is pulled to ground.


Step 1: What You Need?

1 x Arduino Leonardo, Mirco, or Due Board
1 x Pushbutton 


Don't have components? Don't worry. Just click the component's name. 


Step 2: Build Your Circuit.

Connect your board to the USB port, then push the button to connect D2 with GND and initiate the sketch keyboard keypress emulation.


Step 3: Upload The Code.

1. Select the Arduino board type: Select Tools >> Board >> Select your correct Arduino board used.

2. Find the port number by accessing device manager on Windows. See the section Port (COM&LPT) and look for an open port named "Arduino Leonardo (COMxx)". If you are using a different board, you will find a name accordingly. What matters is the xx in COMxx part. In my case, it's COM3. So my port number is 3. 

Select the right port: Tools >> Port >> Select the port number.


3. You can find this code in the example of Arduino IDE.
Select File >> Examples >> 09.USB >> Keyboard >>  KeyboardReprogram

Click press the "upload" button (see the button with right arrow mark).


Remember to have the Arduino Software (IDE) window selected before you press the button.

Download:


09.USB Keyboard KeyboardReprogram library

Monday, July 25, 2016

Keyboard Message

When the button is pressed in this example, a text string is sent to the computer as keyboard input. The string reports the number of times the button has been pressed. Once you have the Leonardo programmed and wired up, open up your favourite text editor to see the results.


NB: When you use the Keyboard.print() command, the Arduino takes over your computer's keyboard! To insure you don't lose control of your computer while running a sketch with this function, make sure to set up a reliable control system before you call Keyboard.print(). This sketch includes a pushbutton to toggle the keyboard, so that it only runs after the button is pressed.


Step 1: What You Need?

1 x Arduino Leonardo, Mirco, or Due Board


Software Required
- Any text editor


Don't have components? Don't worry. Just click the component's name. 


Step 2: Build Your Circuit.

Attach one pin of the pushbutton to pin 4 on the Arduino. Attach the other pin to 5V. Use the resistor as a pull-down, providing a reference to ground, by attaching it from pin 4 to ground.


Step 3: Upload The Code.

1. Select the Arduino board type: Select Tools >> Board >> Select your correct Arduino board used.

2. Find the port number by accessing device manager on Windows. See the section Port (COM&LPT) and look for an open port named "Arduino Leonardo (COMxx)". If you are using a different board, you will find a name accordingly. What matters is the xx in COMxx part. In my case, it's COM3. So my port number is 3. 

Select the right port: Tools >> Port >> Select the port number.


3. You can find this code in the example of Arduino IDE.
Select File >> Examples >> 09.USB >> Keyboard >>  KeyboardMessage


Once you've programmed your board, unplug the USB cable, open a text editor and put the text cursor at in the typing area. Connect the board to your computer through USB again and press the button to write in the document.


09.USB Keyboard KeyboardMessage library

Keyboard Logout


This example uses the Keyboard library to log you out of your user session on your computer when pin 2 on your Leonardo, Micro or Due is pulled to ground. The sketch simulates the keypress in sequence of two or three keys at the same time and after a short delay it releases them.

NB: When you use the Keyboard.print() command, the Arduino takes over your computer's keyboard! To insure you don't lose control of your computer while running a sketch with this function, make sure to set up a reliable control system before you call Keyboard.print(). This sketch is designed to only send a Keyboard command after a pin has been pulled to ground.


Step 1: What You Need?

1 x Arduino Leonardo, Mirco, or Due Board
1 x Pushbutton 
Don't have components? Don't worry. Just click the component's name. 


Step 2: Build Your Circuit.


Step 3: Upload The Code.

1. Select the Arduino board type: Select Tools >> Board >> Select your correct Arduino board used.


2. Find the port number by accessing device manager on Windows. See the section Port (COM&LPT) and look for an open port named "Arduino Leonardo (COMxx)". If you are using a different board, you will find a name accordingly. What matters is the xx in COMxx part. In my case, it's COM3. So my port number is 3.


Select the right port: Tools >> Port >> Select the port number.

3. You can find this code in the example of Arduino IDE.
Select File >> Examples >> 09.USB >> Keyboard >> KeyboardLogout

Click press the "upload" button (see the button with right arrow mark).

Before you upload the program to your board, make sure to assign the correct OS you are currently using to the platform variable.

While the sketch is running, pressing the button will connect pin 2 to ground and the board will send the logout sequence to the USB connected pc.


09.USB Keyboard KeyboardLogout library


  • Copyright © Arduino Tutorial ™ is a registered trademark.
    Designed by Templateism. Hosted on Blogger Templates.