
Step 1: What You Need?
1 x Arduino UNO
1 x HC05 Wireless Bluetooth Module
1 x 2.21k Ohm Resistor
1 x 10k Ohm Resistor
1 x 15k Ohm Resistor
1 x 100nF Capacitor
1 x Prototype Shield
1 x Soldering Iron
1 x Solder
Male-to-Male Jumper Wires
Optional
Arduino Uno R3 Acrylic Transparent Casing
Cable Cover
Arduino Compatible UNO Ultimate Starter Kit / Learning Kit
Don't have components? Don't worry. Just click the component's name.
Cable Cover
Arduino Compatible UNO Ultimate Starter Kit / Learning Kit
Don't have components? Don't worry. Just click the component's name.
Step 2: Build Your Circuit.

- Using a breadboard, temporarily wire the HC-05 Bluetooth module per the schematic.
- With 3.3v on the Key pin, the module will enter 38400 baud command mode and will accept AT commands. The Key pin must be connected to 3.3v when the module is powered on. If it is connected afterwards, the module will enter command mode at the default baud rate (as set by the 'AT+UART=' command or 9600 baud from the factory).
Step 3: Upload Code To Board.

Get the sketch from here and upload it to your Arduino.
Step 4: Run The Setup Sketch & Enter Serial Command.

- Enter the following AT commands into the serial console one by one:
AT+ORGL
AT+ROLE=0
AT+POLAR=1,0
AT+UART=115200,0,0
AT+INIT
In order, these commands tell the module to reset to factory settings, switch to slave role (transparent serial bridge), set pin 32 low on Bluetooth connection, change baud rate to match the Arduino Uno programming rate, and to initialize.
- Disconnect 3.3v from the Key pin and cycle the power to the module. It will now be running at 115200 baud and be in pairing mode.
Step 5: Setup The Bluetooth Module in Windows.

- From the Control Panel select Add a Device.
- Add the Bluetooth module.
- Select enter pairing code option.
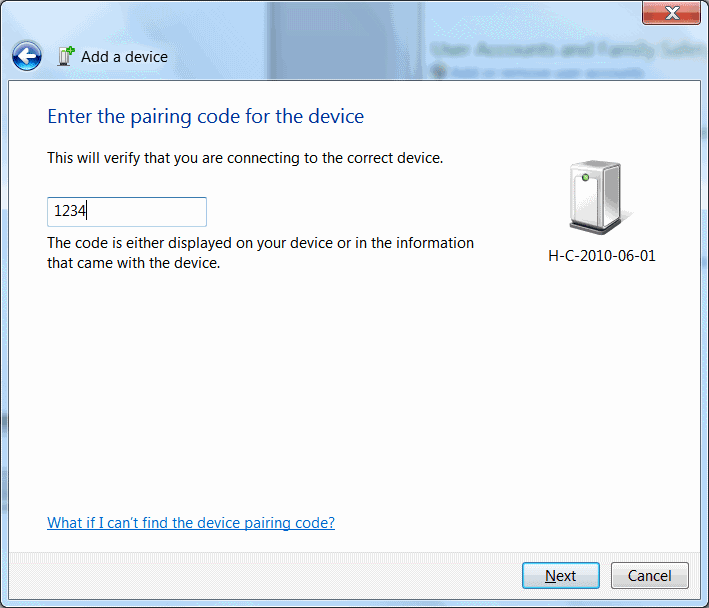
- Enter "1234" for the pairing code.
- At the Add a device success window, click Close.
- Device ready to use. The OS will create two serial COM ports associated with the device. Always use the one with the lower number.
Step 6: Solder A Jumper Wires Onto The Bluetooth Module.

DIY Arduino Bluetooth Programming Shield
- Disassemble the breadboarded circuit. Solder a jumper wire directly to the HC-05's Pin 32.
- Don't forget to use flux.
- You may want to use hot glue or tape to protect the joint.
Step 7: Build The Programmer Circuit.


- Build the programmer circuit onto the prototyping shield.
- Solder on a female header for the Bluetooth module if you want to be able to easily remove it later.
Step 8: Program The Arduino With Bluetooth.

- In the Arduino IDE, choose the serial port of the Bluetooth module (the lower valued one of the two(21 and 25) and then upload a sketch like normal.

My Robot Education Sdn. Bhd. (Robotedu.my) was founded in 2015 as the first robotics education centre in Malaysia to provide Arduino-based robotics courses for youths. Our vision is to be able to provide robotics education to every youth in Malaysia.


0 comments:
Post a Comment