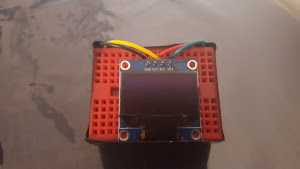
This project tutorial uses an I2C 128×64 OLED to display a tiny cellular automata powered by Arduino Nano.
Step 1: What You Need?
1 x Arduino Nano (can be Arduino UNO as well)
1 x OLED I2C 128x64
2 x Mini Breadboard
1 x Arduino Mini USB Cable
Male-to-Male Jumper Wires
1 x OLED I2C 128x64
2 x Mini Breadboard
1 x Arduino Mini USB Cable
Male-to-Male Jumper Wires
Don't have components? Don't worry. Just click the component's name.
So hook up the Arduino and OLED LCD to the breadboard and start wiring.
Arduino —– OLED
Then I attached both breadboards back to back and created a small TV.
Step 2: Build Your Circuit.
Arduino —– OLED
- 3.3v — VCC (pay attention to your OLED voltage requirements)
- GND — GND
- A4 —SDA
- A5 — SCL
Step 3: Upload Code To Board.
In order to facilitate (and make it possible) to play with the OLED display, we will be using 2 libraries from Adafruit. If you don’t know how to add libraries please visit https://www.arduino.cc/en/Guide/Libraries
Adafruit GFX library which will be used to handle all graphics and text displayed on the OLED https://github.com/adafruit/Adafruit-GFX-Library
Adafruit SSD1306 library which basically is the driver for our OLED. This library works only with OLED SSD1306 128×32 and 128×64 https://github.com/adafruit/Adafruit_SSD1306
On line 51 with code,
display.begin(SSD1306_SWITCHCAPVCC, 0x3C); //initialize with the I2C addr 0x3C (128x64)
the address, which is the 0x3C might be different. I searched for the most obvious and tried a few before getting it to work.


0 comments:
Post a Comment